


Summary
This article provides a comprehensive, six-step diagnostic guide for drivers experiencing power loss or sluggish acceleration in their vehicles. It outlines a systematic approach using basic tools to identify and address common issues, from fuel and air delivery problems to ignition, sensor, transmission, and electrical system faults. The guide emphasizes proactive checks and explains when to seek professional mechanical assistance to prevent minor issues from escalating into costly repairs.
Key Points
- Systematic Diagnosis is Key: Follow a structured, six-step process (Fuel/Air, Exhaust, Ignition, Sensors, Transmission, Electrical) to efficiently pinpoint the root cause of power loss.
- Essential Tools: An OBD-II scanner is crucial for pulling trouble codes and monitoring live data, alongside basic hand tools and a multimeter.
- Fuel and Air are Common Culprits: Start by checking and replacing dirty air filters, cleaning the throttle body, and inspecting for fuel flow issues (clogged filters, weak pump, dirty injectors).
- Exhaust Restrictions Impact Performance: A clogged catalytic converter can severely restrict engine breathing; watch for rotten-egg smells, rattling, and utilize vacuum or back-pressure tests.
- Ignition System Importance: Worn spark plugs and faulty ignition coils lead to misfires and poor acceleration; inspect plugs for condition and gap, and test coils for insulation integrity.
You press the gas pedal expecting power, but the engine hesitates or barely responds. That moment of uncertainty hits hard, especially when you’re merging onto a busy highway.
Sluggish acceleration often starts with simple problems. This systematic six-step diagnostic process utilizes basic tools and helps you identify warning signs more quickly.
By following this approach, you’ll have the confidence to address issues before minor problems become major expenses.
Essential Tools You’ll Need
Before beginning your diagnosis, gather these basic tools:
- OBD-II scanner
- Flashlight and inspection mirror
- Basic socket set and screwdrivers
- Multimeter
- Nitrile gloves and eye protection
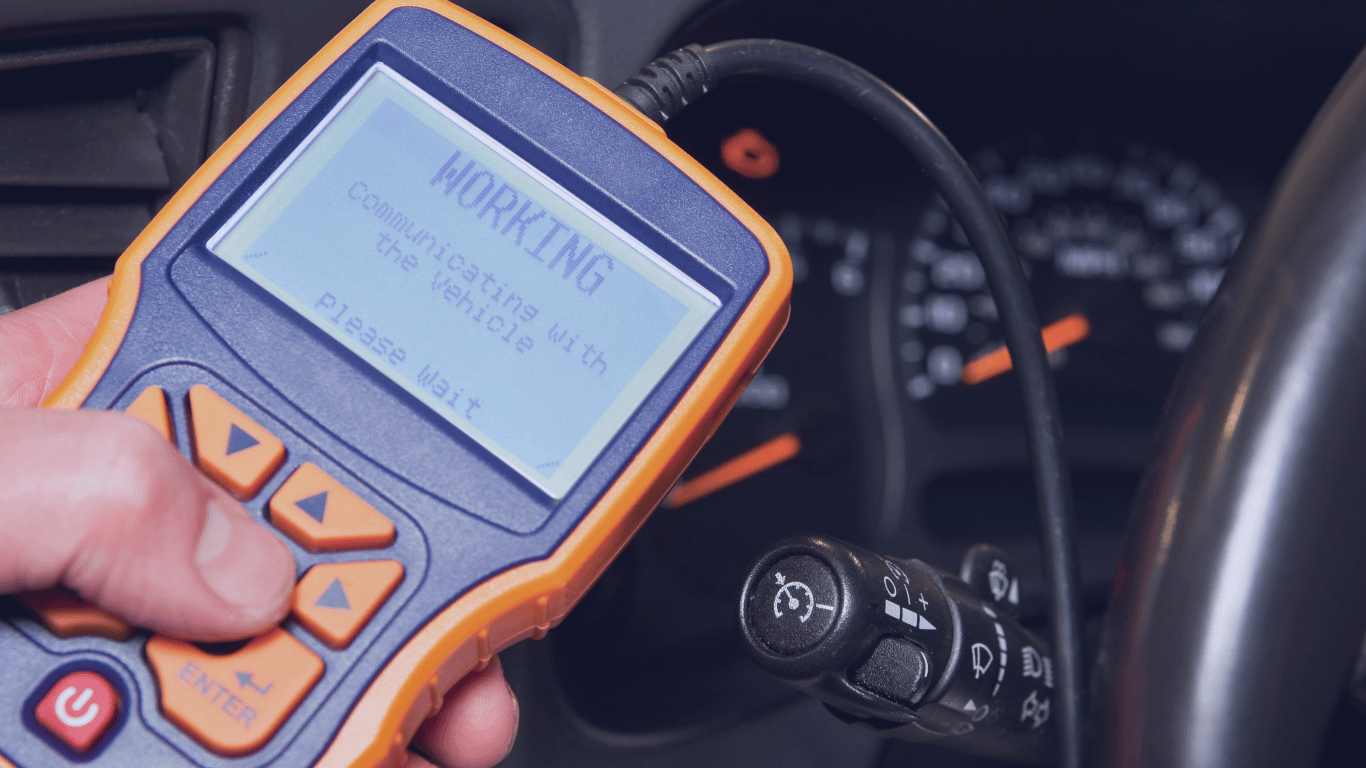
The OBD-II scanner becomes your most valuable tool:
- Plug it into the dash port
- Pull trouble codes
- Watch live data like throttle position or fuel trim to see how the car behaves under load
Even entry-level readers expose misbehaving sensors and fuel issues. When you spot a suspect value, confirm it with your multimeter or a quick visual check. If it passes, move to the next system.
Before you start, follow these critical safety steps:
- Chock the wheels before sliding under the car.
- Disconnect the battery when probing electrical connectors.
- Never reach into a running engine bay.
- Document each finding, codes, fluid levels, voltages, so you’re not guessing later
Follow the six steps in sequence, and you’ll pinpoint most power-loss culprits long before a repair bill spirals out of control.
Step 1. Fuel and Air: The Usual Suspects
When you step on the gas, your engine needs a steady rush of clean air and fuel. If either side gets restricted, acceleration suffers immediately.
Start with these straightforward checks. Most sluggish-throttle complaints stem from simple fuel or air starvation.
Check Your Air Filter First
A quick peek under the hood often reveals the first culprit: the air filter. A filter packed with dust or leaves chokes airflow, upsetting the air-fuel mixture and forcing the engine to work harder for every breath.
If the element appears dark or clogged, replace it. A fresh filter usually costs between $10 and $35 and can restore lost pep almost instantly.
Clean the Throttle Body
A deeper intake restriction, such as carbon buildup around the throttle plate, can create a sticky pedal feel.
Removing the intake hose and wiping the throttle body with sensor-safe cleaner generally requires only a screwdriver and can typically be done in under an hour.
Test Fuel Flow Issues
If the filter checks out, turn your attention to fuel flow. A clogged fuel filter behaves like a plug in a drinking straw. Fuel reaches the injectors in dribbles, not the pressurized stream your engine expects.
Fuel Filter Problems:
- Hesitation during uphill climbs or full-throttle merges
- Replacement costs $15–$70 (DIY-friendly)
Fuel Pump Issues:
- High-pitched whine from the tank
- Hard starts and sputtering at highway speeds
- Frequent stalling or misfires
- Pronounced lag after refueling
Address Dirty Injectors
Injectors come next on the checklist. Over time, varnish constricts the nozzles, disrupting spray patterns and causing jerky throttle response. Dirty injectors commonly cause cars to “buck” while accelerating.
Quality fuel and occasional additives can help, but severe clogging may require professional ultrasonic cleaning.
Watch for Warning Signs
Keep your senses engaged while you work:
- Raw-fuel smell = leak or rich mixture
- Whistling under the hood = vacuum or intake leak
- Repeated “coughing” after fill-up can be caused by contaminated gas, but may also result from other issues such as fuel system or emission component problems.
Any of these red flags means the engine isn’t getting a clean, balanced diet of fuel and air.
Most parts in this first round are inexpensive and accessible. Filters themselves rarely exceed $70.
However, professional throttle-body cleaning services typically cost significantly more than just the price of a can of solvent, due to labor costs.
Step 2. Exhaust Path: Catalytic Converter and Beyond
When your engine can’t breathe out properly, it struggles to perform. A clogged catalytic converter creates back-pressure that chokes your engine, making acceleration feel sluggish, like trying to breathe through a straw.
Recognizing the Warning Signs
Your nose often detects trouble first. That sulfuric, rotten-egg smell means your converter is likely malfunctioning or overwhelmed, often because unburned fuel that should have combusted cleanly in the engine is reaching it.
At night, you might even see the converter glowing red-hot under your car; a clear sign it’s overheating.
Other symptoms include:
- Metallic rattling from underneath the car (loose internal components).
- Pronounced jerking when you try to accelerate, especially uphill.
- Engine won’t rev past a certain RPM, no matter how hard you press the gas.
- Loss of power during highway merging or climbing grades.
Simple Tests You Can Do at Home
You don’t need expensive equipment to check for exhaust problems. Here’s a straightforward test:
Vacuum Gauge Method:
- Connect a vacuum gauge to any manifold vacuum line.
- Let the engine idle, then rev to 2,500 RPM.
- Healthy exhaust systems maintain steady vacuum readings.
- If you see a steady drop of 5-8 inHg, your exhaust is likely blocked.
Back-Pressure Test:
- If you have a back-pressure kit, remove the upstream oxygen sensor.
- Thread in the gauge.
- Look for readings over 1.25 psi at idle or low speed, and any significant increase at 2,500 RPM.
- Higher readings confirm a blockage.
When to Call for Help
Catalytic converter replacement involves cutting, welding, and precise sensor placement, skills that most DIYers lack. Seek professional help immediately if you notice:
- Glowing components under the car
- Internal rattling sounds
- Test results confirming excessive back-pressure
Delaying repairs risks engine overheating and sensor damage, which can multiply your costs.
Step 3. Ignition Health Check
When your engine stumbles during acceleration, spark plugs are often the culprit. These small components create the electrical spark that fires every power stroke, and when they fail, your car loses the crisp throttle response you expect.
Start with a cool engine and grab a dedicated spark-plug socket:
- Unclip one coil pack or plug wire
- Slide the socket over the plug
- Turn counter-clockwise
Once you remove the first plug, you have a clear view into the health of your ignition system.
A healthy plug exhibits a light tan or gray coloring and retains its factory gap. Here’s what different conditions mean:
- Sooty black tip: Rich fuel mixture that robs acceleration
- Bone-white porcelain: Engine running lean, also reducing power
- Oily deposits: Internal leaks requiring professional inspection
- Rounded or eroded electrode: Time for replacement
Check the gap with a feeler gauge. When the gap widens beyond specification, your coil works harder and can trigger the jerky surges that affect acceleration.
If one plug looks worn, replace the entire set. Mixing fresh plugs with worn ones only masks the problem temporarily.
When installing new plugs:
- Thread them in by hand first to avoid cross-threading.
- Torque to your owner’s manual specification, typically 18–25 lb-ft on modern aluminum heads.
Testing Ignition Coils
Spark plugs rarely fail alone. Weak coils create the same hesitation and may trigger misfire codes. Here’s a simple backyard test: mist the coils with water at night and look for blue arcs dancing to ground. If you see sparks, the insulation has cracked.
Replace only the faulty coil on coil-on-plug engines, as each cylinder’s ignition timing is managed independently.
Your engine’s computer can’t compensate for weak spark. When misfires occur, the ECU retards timing to protect the catalytic converter, stealing the crisp throttle response you feel when everything fires perfectly.
By giving your plugs and coils a focused checkup, you restore the clean, synchronized spark your engine needs to respond instantly when you press the accelerator.
Step 4. Sensors and Electronics
Plug an OBD-II scanner into the data port under your dash to pull stored and active trouble codes:
- A basic reader decodes issues like P0101 (MAF) or P0120 (TPS).
- Advanced models display live data, allowing you to view airflow, throttle angle, and fuel trims in real-time.
Many parts stores offer free scanning, or you can build your own interface by following this Arduino project or a DIY guide.
Four sensors control modern acceleration performance:
- Mass Air Flow (MAF) measures air entering the engine
- Dirt or oil film creates false readings
- Leads to lean mixtures and hesitation
- Oxygen sensors monitor exhaust gases
- Tell the ECU whether the mixture burned rich or lean
- Fine-tune fuel delivery
- Throttle Position Sensor (TPS) tracks pedal position
- Erratic signals confuse the computer
- Can trigger sudden surges or dead spots
- Manifold Absolute Pressure (MAP) senses engine load
- Guides ignition timing and fuel flow
- Especially critical on turbo models
Next, clean your MAF sensor:
- Unplug the intake duct
- Spray the delicate wire with electronics-safe cleaner
- Let it dry
- Reinstall
Never rub or use compressed air—you’ll destroy the element. This five-minute fix often restores smooth throttle response.
Resist clearing codes immediately after repairs. Wiping them without solving the root cause only hides evidence the ECU needs for monitoring.
If you’ve replaced or cleaned a sensor, an ECU reset (disconnecting the negative battery cable for 10-15 minutes) wipes the adaptive memory, allowing the computer to relearn fresh values.
Step 5. Transmission and Driveline
When the engine roars but the speedometer barely budges, your transmission or driveline is likely the culprit. You’ll feel it first:
- The tachometer climbs while the car lags
- Shifts bang or hesitate
- A metallic whine accompanies every press of the pedal
These are classic signs of slipping bands, worn clutches, or low fluid pressure.
Start with the quickest check, fluid:
- Most automatics have a dipstick near the firewall
- Park on level ground, set the parking brake
- Let the engine idle in Park
- Cycle through all gears once
- Pull the dipstick
What to look for:
- Healthy fluid is translucent red
- Brown or burnt-smelling fluid has oxidized and causes jerking during acceleration
- If the level is low, topping off with manufacturer-specified fluid can restore smooth shifts
- If it’s dirty, you need a full service with new fluid and filter
A proper fluid change, including a new filter and pan gasket, costs around $150 at an independent shop.
Manual transmission drivers face different warning signs:
- A clutch that catches high on the pedal
- Slips under hard acceleration
- Smells like burning friction material
These symptoms tell you the clutch disc is worn. Keep driving and you’ll glaze the flywheel, turning a few-hundred-dollar adjustment into a $1,000+ replacement.
Don’t ignore strange noises either. A rhythmic clunk during acceleration often means failing CV joints or driveshaft U-joints; components that can snap and leave you stranded.
Catching transmission problems early keeps repair costs and roadside emergencies manageable. At the first sign of trouble, spend five minutes checking fluid levels. Those few minutes can save you thousands in the long run.
Step 6. Battery, Alternator, and Grounds
When your car stumbles under load, don’t overlook a simple truth: every fuel pump, injector, and sensor runs on electricity.
A weak battery or failing alternator starves your engine control unit of steady voltage. The symptoms, including hesitation, sputtering, and even stalling, look identical to those caused by clogged filters or bad fuel delivery.
Electrical faults rank alongside fuel problems as common causes of power loss. Modern cars rely on microprocessors to meter fuel and spark in milliseconds, so even small voltage dips can upset acceleration.
Start with a quick multimeter check:
- Engine off: Measure across the battery terminals. You want a reading close to 12.6V.
- Engine running: Check again. A healthy alternator will bump the voltage to 13.7-14.7V.
- No change or voltage drops: You’ve found your problem.
Pop the hood and inspect the battery posts. Corrosion (that chalky white or green crust) adds resistance just like a kinked fuel line starves gasoline.
Clean the terminals:
- Disconnect the negative cable first
- Scrub both terminals with a wire brush
- Rinse and dry thoroughly
- Tighten firmly when reconnecting
Check your grounds: Trace the thick ground strap from battery to chassis and engine block. A loose or rusty ground can mimic alternator failure, so clean the contact surfaces and retighten.
Battery vs. Alternator: Know the Difference
Once connections are clean, distinguishing between these two is straightforward:
Battery issues:
- Engine cranks sluggishly in the morning
- Runs fine once started
- Problems mainly when starting
Alternator problems:
- Dim headlights that brighten when you rev the engine
- Electronics flicker while driving
- Battery dies repeatedly even when replaced
Before ordering new components, run the full electrical test and clear any corrosion. Skipping this step leads to the “parts cannon” trap, where expensive components are replaced without addressing the underlying problem.
A ten-minute voltage check and terminal cleanup often restore the acceleration you expected when you pressed the gas pedal.
When to Call a Mechanic
You’ve swapped filters, cleaned sensors, and double-checked fluids, yet the engine still feels gutless; or worse, new warning signs have appeared. Certain symptoms move the problem out of DIY territory and straight onto a professional lift.
These warning signs indicate serious issues that require immediate expert diagnosis:
- Thick white or blue smoke from the tailpipe, or steam billowing from under the hood, often signals serious internal leaks or overheating issues that can destroy an engine in minutes
- Loud knocking, grinding, or metallic rattles suggest internal wear you can’t see without tearing the engine apart
- A check-engine light that refuses to stay off after you clear codes with an OBD-II scanner points to deeper electronic or emissions faults
- Complete power loss or forced “limp mode,” where the car won’t accelerate past a set speed, usually means the computer has detected a critical failure in the drivetrain or exhaust system
- Repeated overheating, even after topping up coolant, risks warped heads and should be addressed immediately
- Any symptom that compromises safety. Random stalling in traffic, unresponsive brakes, or steering vibration under load, demands expert attention
Stay Proactive to Keep Your Car Running Smoothly
Addressing power loss and other vehicle issues early can save you time, money, and stress in the long run.
Whether it’s checking fluid levels, inspecting components, or tackling simple fixes yourself, staying on top of your car’s performance ensures a smoother and safer driving experience.
If you’ve followed all the steps and still experience issues, it’s time to seek professional help.
For expert diagnosis and repairs, explore Sunbit’s auto repair directory to find a trusted mechanic near you who can get your car back to peak performance.